To install a light fixture, a little knowledge and the right tools can make the work slightly less intimidating. Here are a couple of things you should know about.
Table of contents
- How to Install Recessed Lighting
- How to Install Recessed Lighting | how-tos | DIY
- How to Install Recessed Lighting in an Existing Ceiling
- How To Install and Wire Your Own Light Fixture
Turn the light on and find the correct circuit breaker in your breaker panel. If necessary turn them off one at a time until the light goes out. Do not depend on the light switch to turn off the power to the light; someone else could turn it back on, especially if it is only one of two or more switches controlling the same light fixture. If you absolutely must leave the circuit breaker on turn off the switch and tape it into the off position with a piece of masking or electrical tape.
Repeat for all the switches that might control that particular light fixture. It is not as safe as turning off the breaker, but hopefully it won't be accidentally bumped on and anyone trying to turn it on will at least pause and ask before doing so. As a professional electrician I not only turn off all power but check with a voltage tester to make absolutely sure there is no current at the light.
How to Install Recessed Lighting
Voltage testers are a virtual necessity for anyone doing electrical repair or work in their home. Please consider the purchase of one of these inexpensive items before performing such work. As a professional electrician there is always one in both my pocket and toolbox, just as a spare in case one fails. All of these tools should be in a homeowner tool set; but if not it would be a good time to start or finish your own tool set. Any old fixture already installed must be removed before installing a new light fixture.
How to Install Recessed Lighting | how-tos | DIY
Remove any glass globes and light bulbs as necessary; you won't want them falling off during the process. Most light fixtures are attached with two screws but some use a large nut to hold the fixture to the ceiling. Loosen and remove the screws or nut as appropriate and gently lower the fixture as far as possible. If there is a mounting bracket attached to the electrical ceiling box, remove and discard it. Now is a good time to check for voltage with a non contact voltage tester if one is available, before proceeding with the removal.
Older houses will occasionally have wiring that is not color coded or is too darkened to readily determine the wire colors - if this is the case make careful note of which house wire is connected to the black and white wires in the light fixture and mark them with a piece of tape for future reference. Remove the wire nuts connecting the house wiring to the light fixture and replace the nuts loosely on the house wiring as a safety precaution. As an elementary safety act, try not to touch the bare wires; yes, current is turned off but a good electrical safety practice is not to touch any wire that could carry current whether turned off or not.
Far too many people have been shocked by wires they thought were off, don't let it happen to you. If the new light fixture is smaller than the old one and will leave an unpainted area of the ceiling visible it would be a good time to apply a little paint. Most house paints will dry in only a few minutes and doing the painting without a new light fixture in the way will be much easier. Before wiring the new light fixture, check the existing house wiring for problems.
Make sure there are no burned places with bare wiring showing except for the ground wire; it is normally bare of any insulation or has green insulation. Check that any existing wire nuts are tight by holding the nut in one hand and firmly tugging on each individual wire. If any loose nuts are found tighten or replace as necessary. If the new light fixture will require a mounting bracket across the electrical box in the ceiling attach that bracket to the ceiling box in preparation for installing the new fixture.
Connect the house wiring to the new fixture, making sure that the house white wire connects to the fixture white wire and the house black wire connects to the black wire on the fixture. The house wiring should include a bare ground wire without insulation or possibly a wire with green insulation to connect to the bare wire in the fixture, but if not connect the bare wire in the new light fixture to the mounting bracket with the green ground screw provided.
Again check the tightness of the new wire nuts by tugging on each individual wire while holding the nut in the other hand. Most light fixtures have a layer of insulation on the upper side, against the ceiling. Try not to disturb this insulation; it is there to keep the heat from the light fixture from going up into the wiring box. Tuck the wires into the ceiling box as much as possible and attach the light fixture to the box, using either the two screws or the long tube and nut that fits in the mounting bracket.
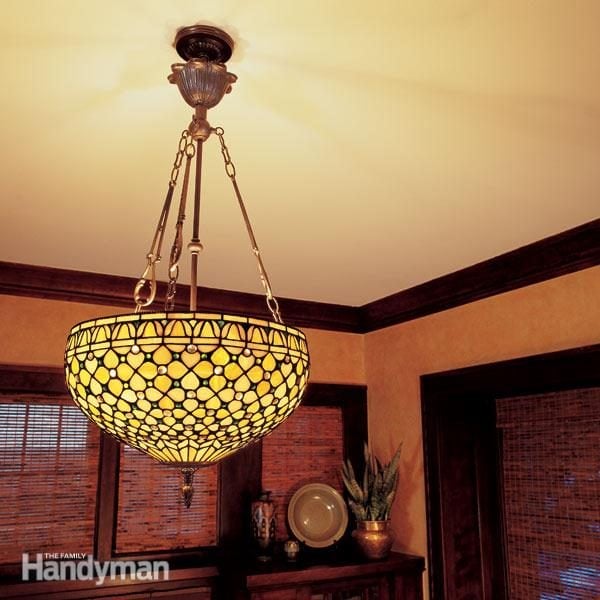
Your new light fixture will have instructions and diagrams on exactly how to attach your particular fixture.
- how to write a good profile for dating site.
- casual dating uk.
- How to Install Low-Voltage Landscape Lighting in Your Yard | Today's Homeowner?
- if he says we are dating.
Tighten the screws or nut firmly, but do not deform the light fixture. Few fixtures fit tight against the ceiling at all points and it is possible to deform it badly by turning screws and nuts too far. Install light bulbs as necessary and attach any light globes that are needed. Most globes are attached with small thumbscrews; again do not overtighten these screws as it will break the glass globe. Tighten just enough to hold the globe in place. Choose light bulbs according to the label on the new light fixture and make sure they are not too high a wattage. A good choice that will save considerable electricity are the small "corkscrew" flourescent light bulbs or even the newer LED lamps.
These have come down considerably in price the last few years and are becoming a viable option for savings. If you have read this article and still have doubts about your ability to install or wire a new light fixture may I suggest this article about learning how to do your own home repairs and improvements. It will cause no harm, whether it is a splice or simply a bare wire.
But it still needs to be terminated on the new light fixture or on the metal pieces that hold the fixture. There are no specific color requirements for 3-way switches. The hook up at the light will be the black light fixture wire to whatever wire is terminated on the common terminal of the 3-way switch. Sign in or sign up and post using a HubPages Network account.
Comments are not for promoting your articles or other sites. Not much, I'm afraid. Unless another light on the same switch has quit working which might give a clue as to what the wires are doing the only other thing is to cap all the wires individually and begin checking voltage with the switch on, and then off.
How to Install Recessed Lighting in an Existing Ceiling
That might give a clue as to what is going on. I went to install a new ceiling light in a hallway where there had been a previous light there but just had a cover plate over it. I removed the plate and the wiring in the box had the white and black wires together with one lone black wire i connected the white wires on the light with the ones that were together in the box i connected black wires on light with the lone black wire in box and light would not work any suggestions. I have a normal cable in the ceiling - 3 wires blue, green, black , and have installed other lights in the place without problems.
However, I've just bought a new light fixture, which runs 6 globes. I'm currently confronted with 6 each of white and black and one green earth wire. Can I safely combine the wires of the same colour and connect them as a bundle to the blue and black? Normally, multi-globe fittings have had the wiring combined within the lamp, and only have 3 wires to connect to the ceiling. I'm rather stumped with this new lamp, but don't really want to return it!
About all you can do is supply a new ground wire. Run an extra wire to a copper pipe or to the ground rod servicing the house.
It sounds like your new lampholder has an outlet to plug in a cord; as such it is required to have a ground or be a GFCI. You can't make a porcelain lampholder into a GFCI; all that's left is to provide a ground. As the receptacle has a ground socket it becomes even more important to provide that ground; anyone using the receptacle will assume the ground is there. Hey great articles on home repair.
I am about to attempt to upgrade an old brass light socket with a porcelain lampholder with grounding outlet. What I want to know is, the new outlet has a ground screw but the old brass socket only has two wires, is there a way to "ground" it safely to anything else? This new outlet will get regular use and I would like it to be very safe.
Normal voltage for light firtexus in the US is V. I think you need to know the maximum Wattage of the bulb for that fixture. That rating is based on the use of an incandescent bulb and the amount of heat given off by that bulb. If you are using the spiral fluorescent bulbs which do not get as hot as an incandescent bulb you can go a little higher in the wattage usage but there is no need because you get much more light candle power from the fluorescent bulbs.
How To Install and Wire Your Own Light Fixture
A 15 watt fluorescent bulb gives off the approximate same light as a 60 watt incandescent bulb. Glad it worked for you, and thanks for letting me know. It's always nice to know when I've helped someone out. You're certainly welcome, as well - after all, that's why I write these articles.
I did as you said and my light now works. Turns off and on and doesn't flow fuses anymore. I greatly appreciate all your help. In the light box behind the new fixture you are installing are 3 cables, with three white wires spliced together, two black wires spliced together and one red wire. And connecting the wire with wording to the black wire results in a light that won't turn off.
The wire with no wording needs spliced in with the other 3 white wires, and it sounds like you did that. The wire with wording, however, needs to be attached to the red wire instead of the black.